Buying a TV always comes with an upgrade, but many users don't know much about upgrades. Today Xiao Bian used Hisense LCD TV as an example to teach everyone how to upgrade the firmware.
Hisense upgrade firmware collection: http://pan.baidu.com/share/home?uk=101478531#category/type=0
U disk upgrade:
note:
1. Please use the genuine brand U disk, preferably with indicator light. During the upgrade process, you can see the flashing (read the data in the U disk). After the upgrade, you can see the light blinking and stop.
2. Do not break or unplug the USB flash drive during the upgrade. Otherwise, the upgrade fails. The upgrade is performed through the serial port tool.
3. If no upgrade file is detected, format the U disk to fat32 and try again.
4. After the upgrade is complete, it is recommended to enter the factory menu to clear the parent block. Generally, select [CLEAR UNPROTECTLY] from the factory menu [Factory Init] item or [Init] item.
5. Some models may have multiple movements. Please confirm the actual movement during the upgrade.
MT5301D movement
1. Upgrade the software into the root directory of the U disk, named upgrade.pkg.
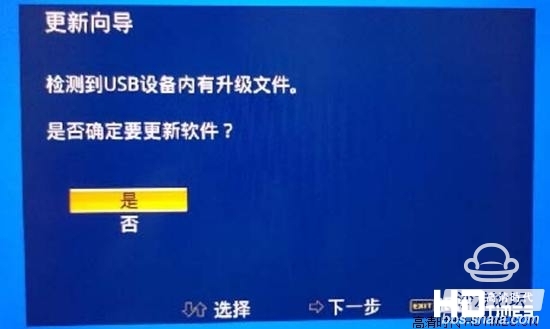
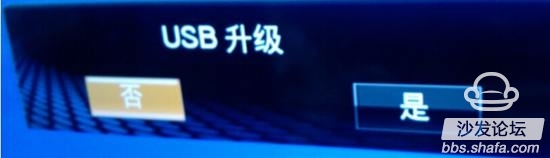
2. When the TV is turned on, insert the USB flash drive into the USB port of the TV. The TV automatically detects the upgrade software. Select “Yes†to upgrade according to the screen prompts. Enter the following picture:
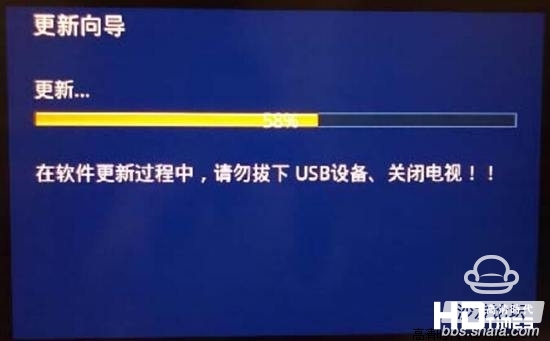
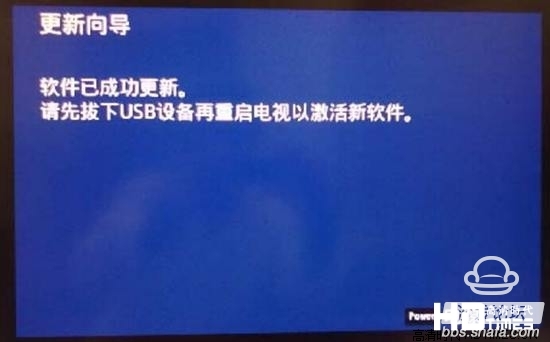
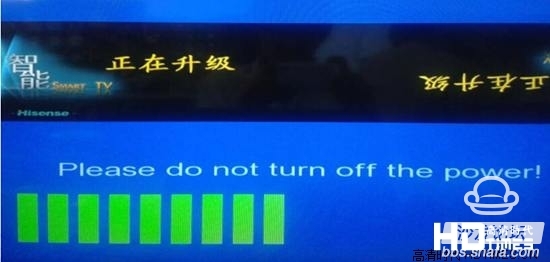
3. The upgrade process is as shown in the figure below. After the upgrade is complete, unplug the USB flash drive, and then restart the communication and shutdown.
Special note: Because the entire upgrade process does not have any relevant display information on the screen, the upgraded intelligent monitoring or observation through the relevant serial port program, the system reads the USB device indicator will be present at that flashing state.
RTD2644/2649 movement
1. Automatically upgrade the file name according to different models have different names, for example: the model LED32K20JD (1111) corresponding upgrade file name is "LED32K20JD_V1111.img".
2. The U disk upgrade software LED32K20JD_V1111.img side USB root directory, insert USB, wait for a few seconds, the following will pop up the upgrade prompts:
3. Move the cursor to “Yes†as prompted and press the “OK†button on the remote control.
4 TV first black screen for about 15 seconds, then pop up the upgrade interface as shown:
5. Wait for a period of time, the TV will complete the upgrade, will pop up the following menu prompts, at this time do not operate the remote control, waiting for the TV to automatically restart. The upgrade process takes about 1 minute and 30 seconds.

6. After the TV is automatically restarted, the upgrade is complete.
Note: U disk cannot be upgraded when empty. Use the serial port to write mboot program first: MBOOTLED32K20JD_bootloader.bin.
Forced upgrade: Change the U disk upgrade software file name to install.img. Put it in the U disk and change the directory. After inserting the USB, the AC power off, then press and hold the local button MENU (hold down the button and do not let go) while communicating Turn on the power, then release the MENU button after 10 seconds, and wait for the TV to upgrade automatically.
Hisense upgrade firmware collection: http://pan.baidu.com/share/home?uk=101478531#category/type=0
U disk upgrade:
note:
1. Please use the genuine brand U disk, preferably with indicator light. During the upgrade process, you can see the flashing (read the data in the U disk). After the upgrade, you can see the light blinking and stop.
2. Do not break or unplug the USB flash drive during the upgrade. Otherwise, the upgrade fails. The upgrade is performed through the serial port tool.
3. If no upgrade file is detected, format the U disk to fat32 and try again.
4. After the upgrade is complete, it is recommended to enter the factory menu to clear the parent block. Generally, select [CLEAR UNPROTECTLY] from the factory menu [Factory Init] item or [Init] item.
5. Some models may have multiple movements. Please confirm the actual movement during the upgrade.
MT5301D movement
1. Upgrade the software into the root directory of the U disk, named upgrade.pkg.
2. When the TV is turned on, insert the USB flash drive into the USB port of the TV. The TV automatically detects the upgrade software. Select “Yes†to upgrade according to the screen prompts. Enter the following picture:
3. The upgrade process is as shown in the figure below. After the upgrade is complete, unplug the USB flash drive, and then restart the communication and shutdown.
Special note: Because the entire upgrade process does not have any relevant display information on the screen, the upgraded intelligent monitoring or observation through the relevant serial port program, the system reads the USB device indicator will be present at that flashing state.
RTD2644/2649 movement
1. Automatically upgrade the file name according to different models have different names, for example: the model LED32K20JD (1111) corresponding upgrade file name is "LED32K20JD_V1111.img".
2. The U disk upgrade software LED32K20JD_V1111.img side USB root directory, insert USB, wait for a few seconds, the following will pop up the upgrade prompts:
3. Move the cursor to “Yes†as prompted and press the “OK†button on the remote control.
4 TV first black screen for about 15 seconds, then pop up the upgrade interface as shown:
5. Wait for a period of time, the TV will complete the upgrade, will pop up the following menu prompts, at this time do not operate the remote control, waiting for the TV to automatically restart. The upgrade process takes about 1 minute and 30 seconds.
6. After the TV is automatically restarted, the upgrade is complete.
Note: U disk cannot be upgraded when empty. Use the serial port to write mboot program first: MBOOTLED32K20JD_bootloader.bin.
Forced upgrade: Change the U disk upgrade software file name to install.img. Put it in the U disk and change the directory. After inserting the USB, the AC power off, then press and hold the local button MENU (hold down the button and do not let go) while communicating Turn on the power, then release the MENU button after 10 seconds, and wait for the TV to upgrade automatically.