LED light strips have become a popular choice for both indoor and outdoor decoration, finding their way into homes, businesses, and public spaces. As you walk along the street at night, you’ll often see various creative shapes and designs using LED lights, which have now become a common feature in many households. However, many people are still unsure about how to properly install an LED light strip. Improper installation can lead to issues such as uneven lighting, reduced lifespan, or even damage to the strip. In this guide, we’ll walk you through the correct way to install LED light strips and highlight important things to keep in mind during the process.
**How to Install an LED Light Strip**
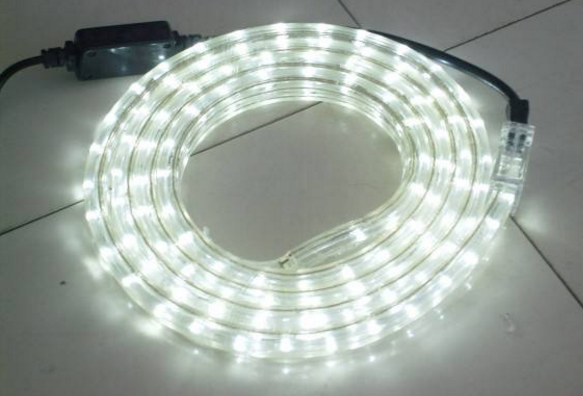
1. **Determine the Required Length**: Before starting, measure the area where you plan to install the LED strip. These strips are typically sold in 1-meter segments. If your desired length is not a whole number, it's better to round up. For example, if you need 7.5 meters, it’s safer to purchase 8 meters. Cutting the strip at the designated cut points ensures that the circuit remains intact and prevents parts of the strip from failing to light up.
2. **Check Polarity**: LED strips are powered by DC current, so they have positive and negative poles. If you reverse the polarity, the strip won’t light up. Always double-check the connections before powering on the strip. If the connection is not working, make sure you’ve removed the plug from the other end of the strip.
3. **Prepare the Surface**: LED strips are usually packaged flat, but once unrolled, they may become slightly curled or distorted. To make installation easier, lay the strip on a flat surface and place it into a channel or groove. Since the strip is single-sided, improper placement can result in uneven brightness, especially around corners. Make sure the surface is clean and smooth for optimal adhesion.
4. **Use Clips or Mounting Accessories**: There are special clips available on the market called “light belt companions†that help secure the LED strip in place. These accessories make installation more efficient and ensure the strip stays in place over time, improving both aesthetics and functionality.
**LED Strip Installation Guide**
**Indoor Installation Tips**
When installing LED strips indoors, the process is relatively simple since they don’t have to withstand harsh weather conditions. First, clean the wall or surface where you plan to attach the strip. Remove any dust or dirt that could affect the adhesive. The back of the LED strip usually has a 3M double-sided adhesive tape. Simply peel off the protective layer and stick the strip in place. Avoid bending the strip directly over LEDs or components to prevent damage. Also, be mindful of static electricity during installation, and avoid using sharp objects or strong chemicals near the strip.
For ceiling installations, consider the weight of the strip and the tension from the wires. It’s recommended to fix the strip with a clip every 0.5 meters, especially at bends or corners. A fixed slot should be placed within 0.3 meters of the end to prevent sagging. When dealing with long lengths or corners, remember that each LED strip is made up of three LEDs connected in series-parallel. This allows for individual cutting without affecting the rest of the strip.
**Important Note**: Avoid placing any conductive materials, such as metal or nails, near the contact points between the strip and the wall. If necessary, remove or cover these materials to prevent short circuits.
**Power Connection Method**
Most LED strips operate on 12V DC power, so a switching power supply is required. When connecting multiple strips, follow this rule: (Power supply capacity × 80%) ÷ (power per meter of strip) = maximum number of meters you can control. Each strip should not exceed 5 meters in length when connected in series. It's best to use a centralized power supply for multiple strips. For example, if you have a 20-meter strip, you can connect up to 50 meters using three power supplies in parallel. This method makes installation easier and allows for centralized control. However, it doesn't support individual control of each strip, so adjust based on your specific needs.
**Wiring and Bus Connector**
Before connecting the LED strip to the main power supply, always confirm that the terminal is set to DC 12V. Never connect it to 220V AC, as this will immediately damage the strip. Always verify the wiring with a qualified electrician before testing the power.
**Common Issues and Solutions**
1. If part of the strip doesn’t light up, check for reversed wiring or poor soldering. If the issue persists, check the solder joints.
2. If only part of the strip is dim, it might be due to a short circuit or insufficient power. Test the voltage output of the power supply; if it’s below 12V, replace the power supply.
3. If a section of the strip is significantly dimmer than others, it could indicate a faulty segment. In such cases, it’s best to contact the manufacturer for replacement.
By following these steps and tips, you can ensure a safe, efficient, and long-lasting LED light strip installation. Whether for home decor or commercial use, proper installation is key to achieving the best lighting effect.


5-50kg Transport drones,A large payload unmanned aerial vehicle that can be used for multiple purposes and functions such as rescue, transportation, lighting, law enforcement, etc
We can customize drones with different distances, weights, and application scenarios according to customer needs, hoping to bring higher efficiency to your work. Please do not use them for warfare


Customized Throwing Transport Drones,Heavy Duty Drone,Firefighting and Rescue Heavy Drones
Jiangsu Yunbo Intelligent Technology Co., Ltd , https://www.fmodel-ai.com